Subtle Saturation - In Post #500
I think the small, subtle adjustments made to images are very important - equally if not more important than the basic development. After the major changes to the tonality of an image are complete, and the color corrections and adjustments are done, turn attention to the details. Spend time with localized, nuanced refinements to accent and emphasize the subjects and stories of your photos.
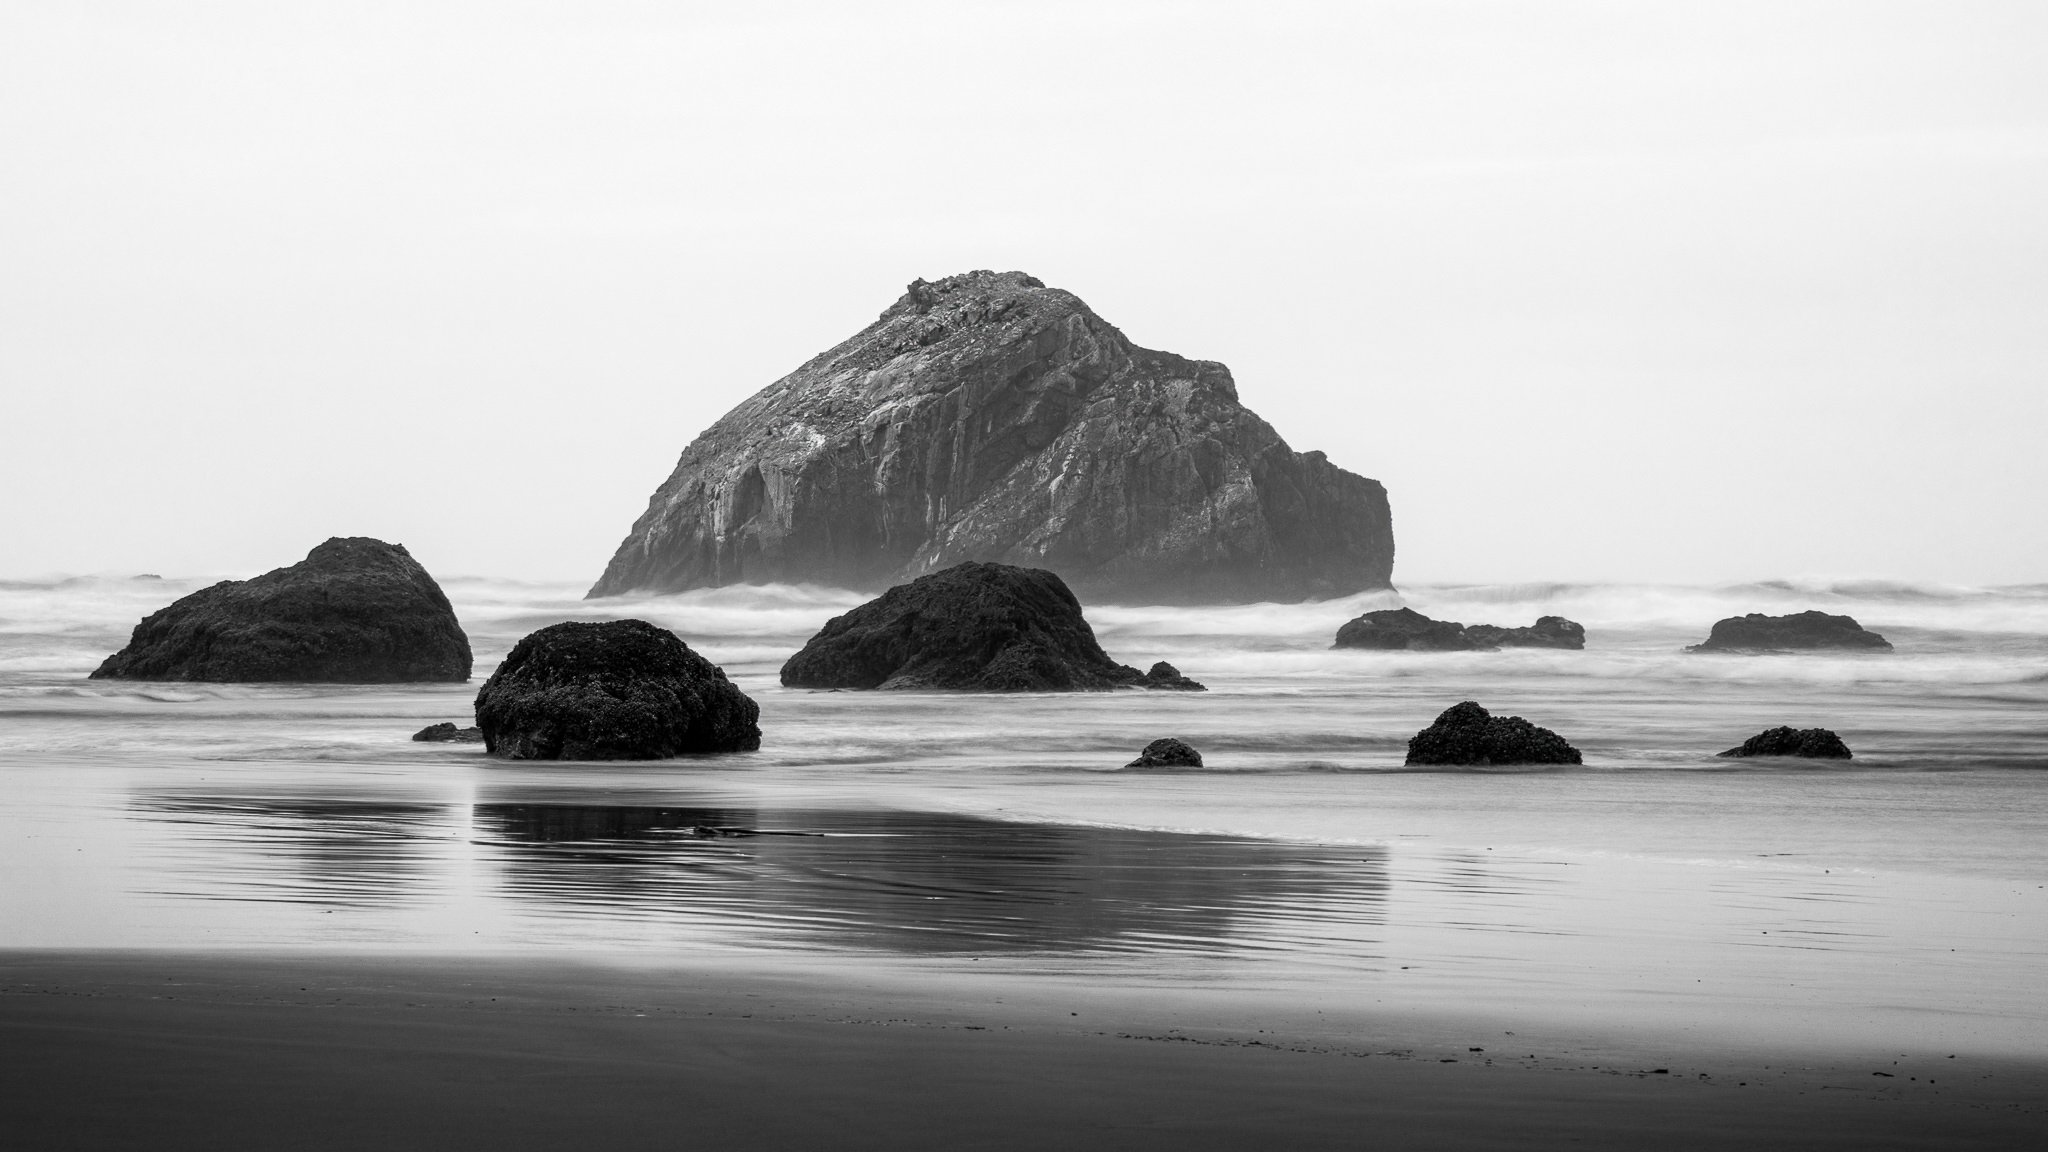
This photo of a lone rock in the ocean shallows is very much a cooler-toned image. The rock is the primary subject of this photo. A little boost to the saturation of the oranges and yellows on its surface adds a nuanced visual clue to the viewer to focus attention on it. Also, making the algae a slightly richer and warmer orange tone can play up the ever-classic warm/cool palette.
There are several approaches you might take to boost colors in a photo. Yet all methods are not created equally.
Global Saturation
In the Basic panel in Lightroom (and in all modern post-processing software) there is a Saturation slider to increase global saturation. The operative word here is global. A Saturation slider affects all of the colors in the entire photo. In this photo, increasing a Saturation slider would not only boost the oranges of the algae on the rock but also the blues throughout the photo. It would not yield the desired result of adding a highlight to just the orange-toned algae.
A related slider, Vibrance, works similarly. The Vibrance slider is somewhat tamer, increasing color in only the more muted tones in a photo. Nevertheless, when used in the Basic panel, an increase in vibrance affects all colors in the whole of the photo.
For targeted color adjustments, the global sliders are rarely the correct choice.
HSL For The Entire Photo
Another approach is the HSL panel - Hue, Saturation, and Luminance. Other software may refer to this tool by other names. For example, ON1 Effects calls this tool the Color Adjustment filter. It’s key characteristic is that individual color channels can be independently. An adjustment to one color range does not affect the others. For example, HSL allows for a saturation increase to oranges and yellows without affecting the color richness of aquas or blues.
For this scene, the only oranges and yellows in the photo are on the rock. Increasing the Saturation sliders for Orange and Yellow in HSL have the desired effect, the algae on the rock has a stronger color presence and is more prominent. Other areas of the photo remain unaffected. Why? The other areas do not intersect with the Orange and Yellow color channels. The sky and ocean are blue and aqua, and the rest of the rock is desaturated, lacking any significant color.
HSL adjusts color and saturation globally. In a scene like this, where the only warm tones are the tufts of seaweed and algae on the rock, global adjustments work well.
Localized Saturation Adjustments
Many scenes do not have the color isolation that my example photo does. To truly isolate a saturation adjustment, use the gradient, radial, or brush tools to apply an adjustment. These masking tools allow you to apply a change to a selected region of a photo. In my example, a brush tool is the a good fit. Sweeping a brush over the top of the rock where the orange algae is limits the effect of the brush to only the painted area of the image. Adjustments to the sliders, such as boosting Saturation, only accent the areas you the photographer choose.
Brush strokes are refined further with a color range mask. Setting the Range Mask to Color and using the eyedropper to select an orange tone automatically adjusts the brushed mask. The Amount slider offers even more control to set how close of a match to the sampled color other tones must be to be affected by the brush.
These same types of controls exist for the gradient and radial tools, too. They are very powerful.
The mask of a Color Range in Lightroom. The brush strokes are further refined by limiting impact to a selected color range.
Gradients, radials, and brushes in Lightroom enable very targeted adjustments. Use a Color Range mask for even more control.
Pro tip: You can get a localized HSL equivalent for a particular color range by applying a color range mask, then using the Hue, Saturation, and Exposure sliders. Exposure acts as your luminance control.
Conclusion
Local adjustments are an important part of shaping and refining the subject and story of your images. Selective saturation is just one of many different ways you can use targeted adjustments to add emphasis to key elements in your photographs. Explore the local tools, learn to use them, and make stronger images.
Swirl At Swami’s Blue
Contact Scott to commission a print or license this image.