Auto-Align Skewed Images In Photoshop
I captured a few images handheld that I wanted to combine. Handheld captures mean the individual photos were skewed and misaligned - unless you are an incredibly stable-handed photographer (which I am not!). The scene had a lot of detail and lines. Could Photoshop pull off the alignment? With ease! I was happily surprised with the result.
Here are the quick steps to send photos from Lightroom to Photoshop and auto-align them.
Step 1 - Lightroom: Open As Layers In Photoshop
My workflow begins in Lightroom. Select the set of photos you want to align. Right click and choose Open as Layers in Photoshop.
Step 2 - Photoshop: Select All The Layers And Auto-Align
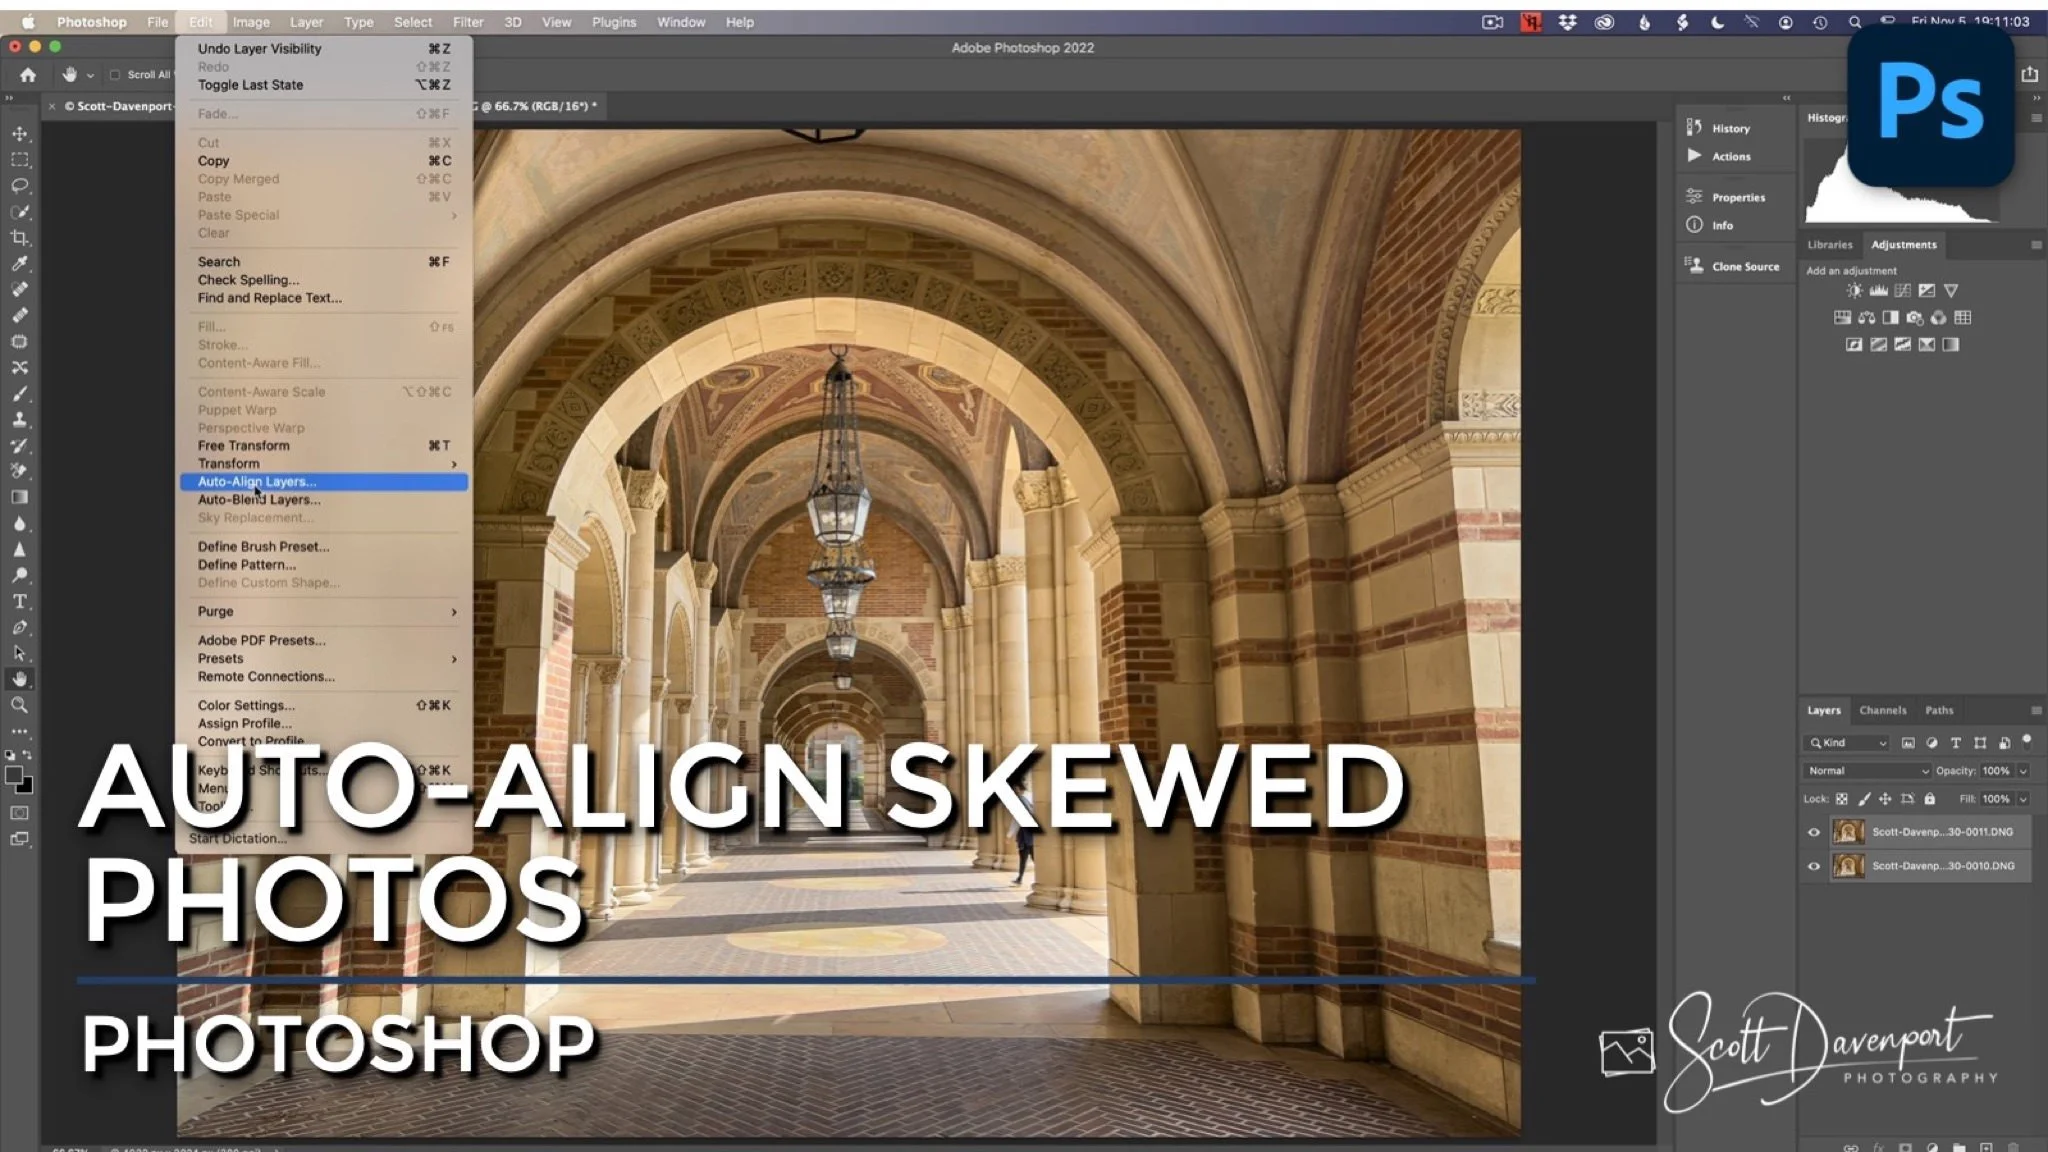
After a few moments, all the selected photos are sent into Lightroom, each photo on its own layer. Select all the layers in the layer stack. Then, choose Edit > Auto-Align Layers from the menu.
Step 1 - In Lightroom, select the photos you want to align and send them into Photoshop as layers.
Step 2 - In Photoshop, select all the layers in the layer stack and choose Auto-Align Layers from the Edit menu.
Step 3 - Choose An Alignment Projection
Photoshop offers many different types of alignment options. In most cases, the Auto option works very well for a sequence of hand-held photos of the same scene. Click OK and Photoshop gets to work. If Auto does not work best for your alignment, you can always Undo and try a different projection.
And you’re finished! Often it is the case that one or more of the layers needs to be rotated and repositioned to get everything aligned. Some pixels are lost at the edges. You can see that in this example. The checkerboard pattern across the top and left edges shows what’s lost.
From here, you can continue with your editing - and break out the Crop tool to trip away those empty spaces on the canvas.