Crafting A Composite From Handheld Photos

If you enjoy posts like this, please support my work and support independent photography tutorials like this.
A technique I have shared multiple times on my channel is capturing several photos of the same scene and blending the best parts of each capture into a composite. And that works great when you’re on a tripod.
But what if there’s not enough time to set up your tripod?
In fast-changing, dynamic lighting or fleeting scenes, you may not have the luxury of time. You can still create composites to incorporate the best elements of multiple photos even when capturing handheld. There is a little more work involved in post, but nothing that our modern tools can’t handle.
Capturing The Frames
When you’re shooting handheld a small amount of movement between frames is inevitable. Yet when thinking about compositing, you can minimize the differences in framing between photos. Tuck your elbows into your body firmly and press the viewfinder against your eye slightly. You’re creating a “human tripod” with the points being your elbows and head.
Also. keep your focal length the same between frames, and resist the urge to tilt the camera. The more similar each individual photo is, the better the blending results in post will be.
Align The Images
In post, assess your images and choose the set of individual photos you need for your composite. In my example, I have everything I need in two photos. One has a pleasing curl of mist moving between the hills and another has more interesting wave action in the rocks.
In Lightroom, I select both images, right click and choose Edit > Open as Layers in Photoshop. If you use another laying package like ON1 Photo RAW or Affinity Photo, you can use those.
Once in Photoshop, each image is on its own layer. Select all the layers in the layer panel and choose Edit > Auto-Align Layers. Photoshop analyzes the individual images, finds prominent features and objects, and aligns the layers.
Note: You will likely see checkerboard patterns and (what appear to be) misalignments at the edges. Often, after layer alignment, some cropping is needed to trim away areas that do not have overlap.
Open the images in Photoshop, or your preferred layering software.
Align the layers. In Photoshop, select all the layers first. The Auto option generally works very well.
Create The Composite With Masks
Finally, use layer masks to reveal the portions of each individual image you want included in your composite. I prefer to work from the bottom up. The bottom layer has most of what I want for the photo. With each layer above my “base”, I’ll apply a pure black mask (hide everything) and then use masking tools to reveal the portions of the top layer I want added to the composite.
In this example, I preferred the overall lighting in the whole photo on the image that captured the mist. I put the mist as my bottom, or base, layer. Then, I painted in just the wave action of the ocean for the upper layer.
Watch the video around the 03:20 mark to see the masking in action.
Use layer masks to build the composite.
And there you go! Once the masking is done and the composite is created, you can continue editing the image. I recommend creating a new stamped layer with all of the visible pixels, and then applying adjustments to the single layer.
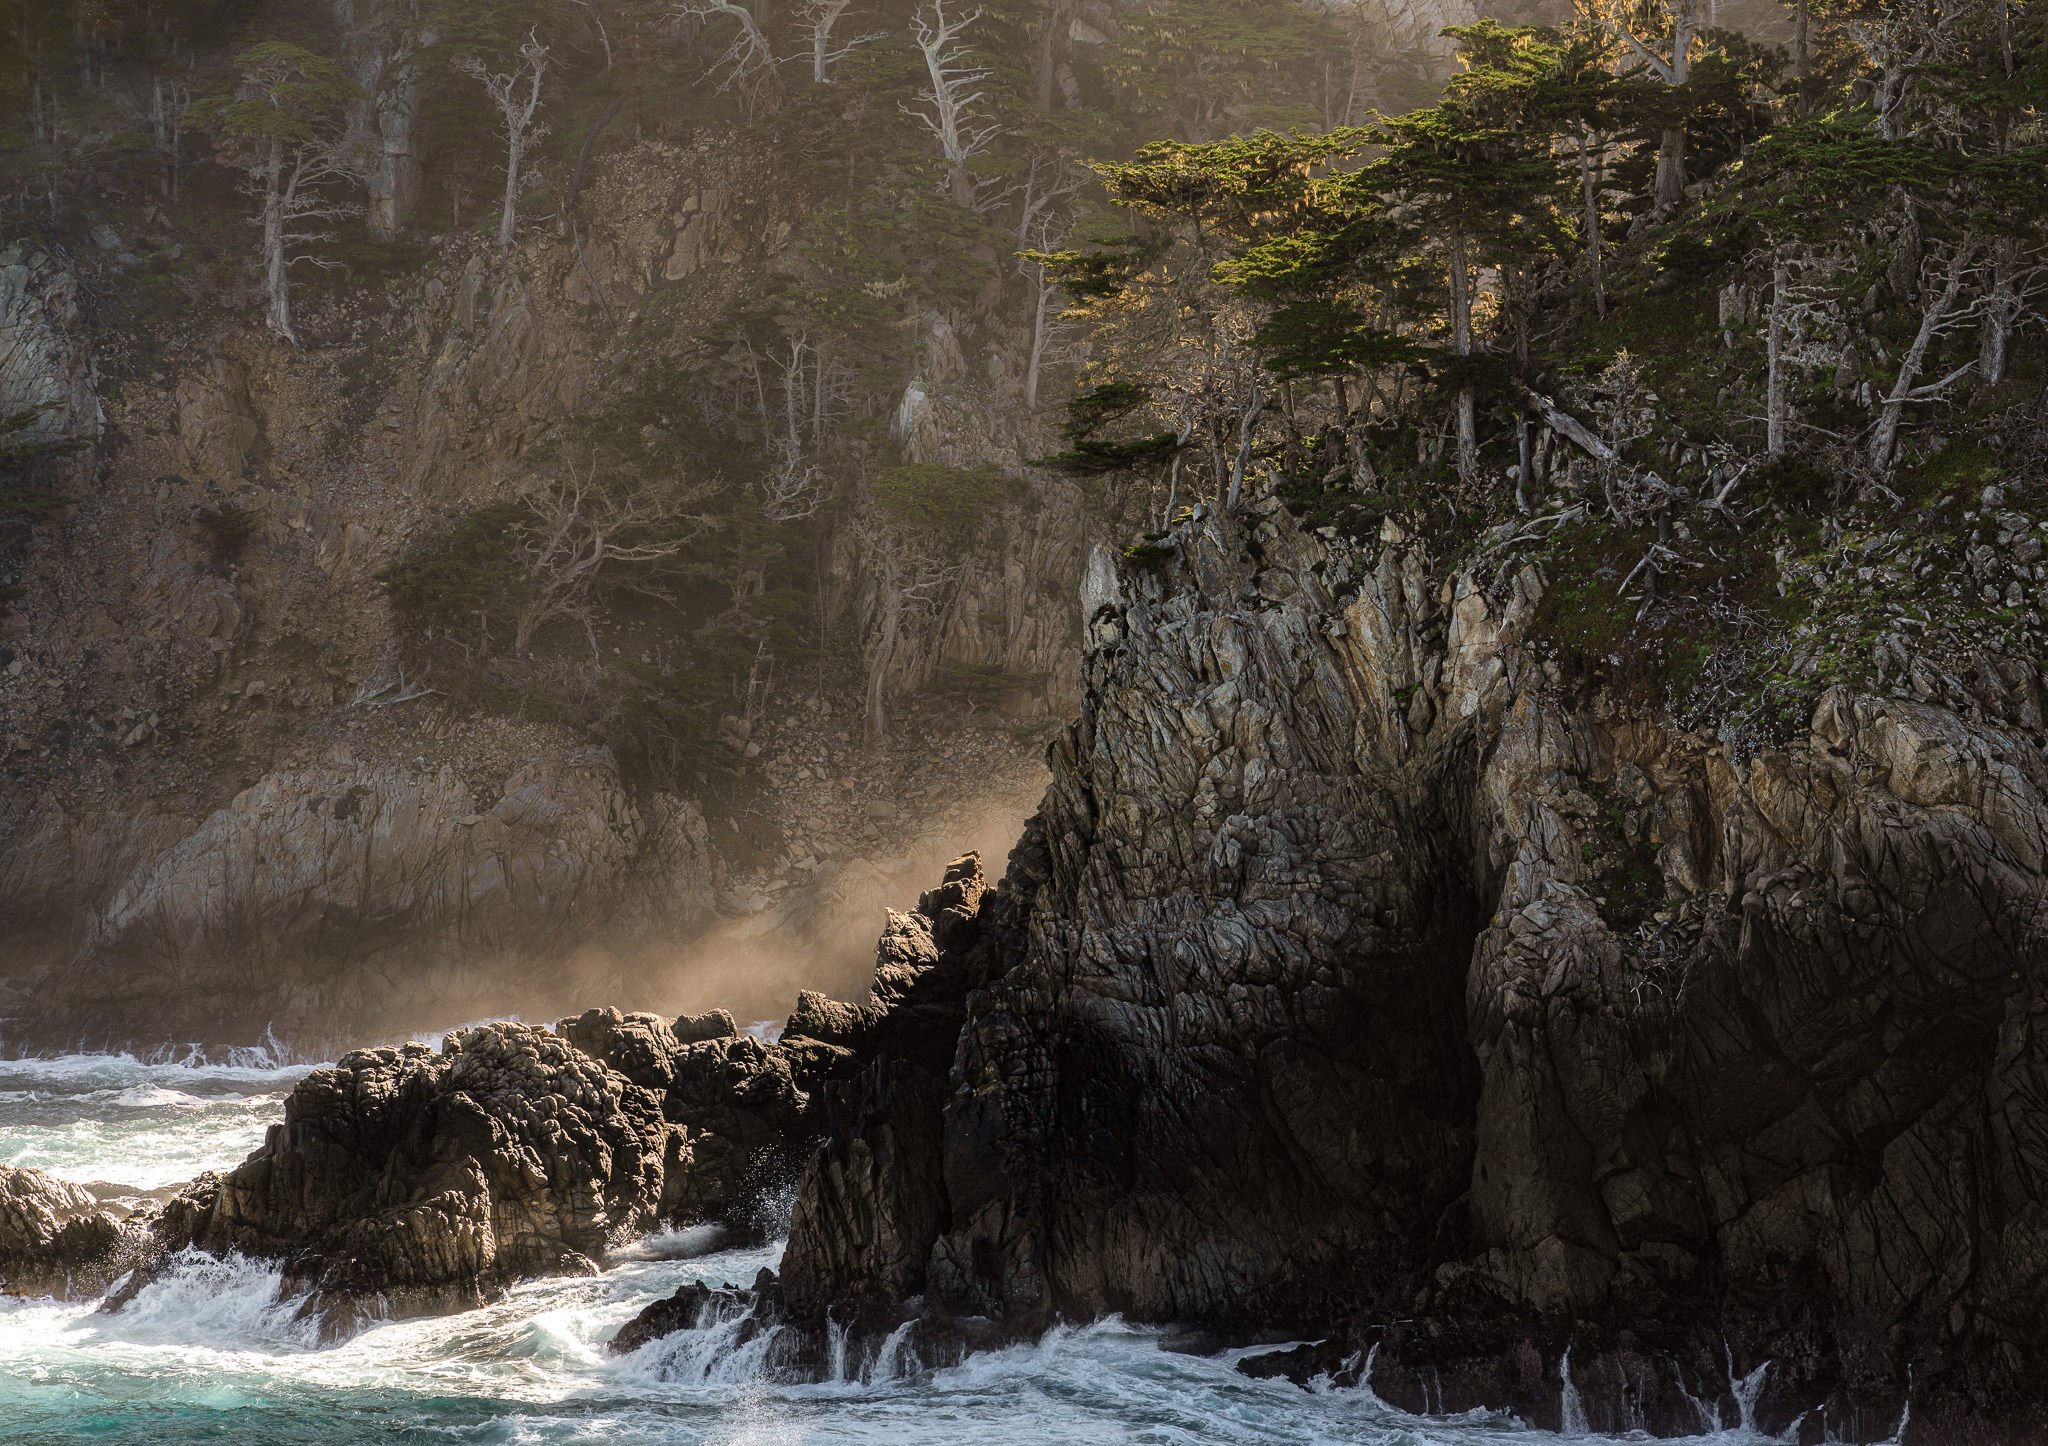
Cypress And Surf, Point Lobos, Carmel, California
Contact Scott to commission a print or license this image.