The Glow Tool - Luminar AI
If you are trying Luminar AI or upgrading from a prior version, please consider using my affiliate link. There is no extra cost to you and it helps support Luminar AI tutorials like this one. Ready to buy? Use the offer code SDP10 at checkout and Save US$10!
I like a glow look as a finish touch for many of my landscape photos. A glow can enhance a calm feeling or add mystery and ambiance to a photo. Glows also work well for portraits, too. This article takes a closer look at the Glow Tool in Luminar AI.
Four Types Of Glow In Luminar AI
The Luminar AI Glow Tool offers four different types of glow looks. All of the looks are adaptive in that the brighter areas of your photo are affected more strongly than the darker areas. And that makes natural sense - bright things glow, dark things don’t glow! The resulting mix creates photos that have both crisp and soft areas.
Soft Focus: Adds a diffused, soft look that is much stronger in the bright areas of a photo. This is often a good choice for portraits, or to create a mysterious quality in the brightly lit areas of a scene, such as street lights in a cityscape.
Glow: A classic glow, adding softness to brighter areas and, to a lesser degree, darker areas. The level of softness is less aggressive than Soft Focus.
Orton Effect: This look simulates a double exposure film technique, producing a dreamy quality for a photo. Contrast is strong in this look and shadow areas get very dark. I like a tempered version of this look for many of my landscape photos. It is also good for portraits.
Orton Effect Soft: A less contrasty version of Orton Effect. By default it has more of a matte look to it, with shadow areas being more of a slate gray.
After selecting a glow type, use the Amount slider to control how much or how little of the effect you want applied.
Refining The Luminar AI Glow Tool
After selecting and applying a glow type, the Amount slider adjustment usually gets you close to your final look. There may be a few spots in the photo that need refinement. The controls in the Advanced Settings area can help.
Softness: Adjust how crisp or soft the glow effect is. Watch the edges of things in your photo while you adjust this slider to ensure things that should be sharper stay that way.
Brightness: Refine the brightness of the photo. Useful to temper the glow in the highlights.
Contrast: Increase or decrease contrast. Useful if a glow washes out contrast or deepens shadows too much.
Warmth: Adjust the temperature of the look. Primarily a stylistic choice.
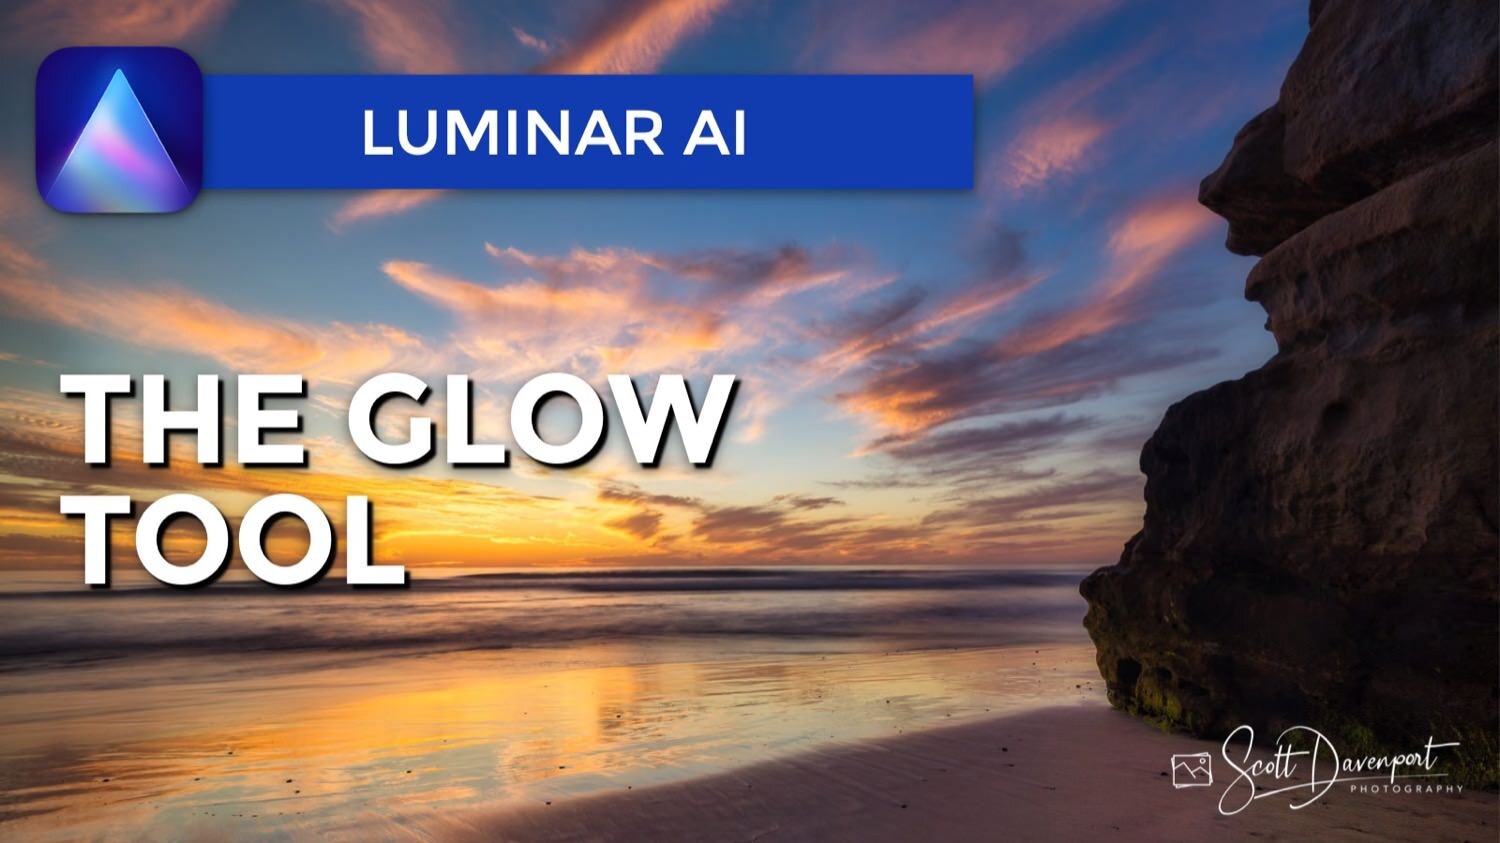
Softness is the one slider that is directly related to the Glow Tool. Other adjustments can be made using other tools in Luminar AI. However, having them at your fingertips in the Glow Tool is a convenience. For example, in the photo in this article, I dialed down the Brightness slider. Glow looks can be very aggressive in the highlight areas. Often, I need to temper the highlights after applying a glow look, and the Brightness slider makes that easy. For Orton Effects, Contrast is a slider that sometimes needs adjustment, too.
Use the Advanced Settings to refine the Glow.
The Luminar AI masking tools are also available to apply or remove the glow to/from specific elements in your photo.
The masking tools are also available in the Glow Tool. After refining the sliders, if the look is too strong for certain elements, open the masking tools and use them to reduce the glow. A mask with a healthy feather and partial opacity is a good choice, so the glow naturally blends across the scene. In this photo, I reduced the glow look in the dark cliff face on the right side, leaving some, but not a full amount, of the Orton Effect.
After Glow
Contact Scott to commission a print or license this image.